So we learned something new, the hard way.
The in and out to the impeller are sideways on our engine. So the in is at the bottom of the impeller housing and the out is at the top. It then goes into a pipe to the stack tube. The pipe is connected to the impeller housing with a piece of hose and at the stack tube end with a piece of hose.
This hose comes off the sea strainer.
Our sea strainer. We have built a fresh water flush into the sea strainer and this shows the salt water or fresh water into the sea strainer. Just flip the valve for the water type. The other side of the sea strainer has the hose to the impeller coming out going to a loop and then the sea strainer. Of course we still have a salt water thru hull with a valve and a strainer on the outside of the hull to prevent bugs and such from clogging the thru hull. This is a little much info but here it is anyway. The plastic sea strainer if for one of the HVAC units.
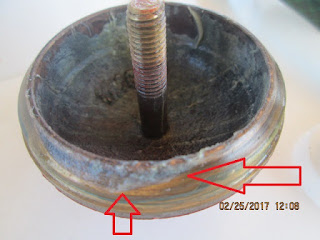
Removing the cap from the rear of the engine stack tube in the heat exchanger.
There was gooey with antifreeze in parts of the cap by where the cap was near the bad spots on the stack tube below.
Here you can see the O-ring looks fine but the bottom flow of the stack tube looks somewhat clogged. We think this is a result of the Prestone antifreeze 97 percent and then mix it 40\60. That is 40 coolant 60 water.Next we took off the forward stack tube end cover (front of motor-Beta 38hp) and we saw that the seal was not sealed properly! Now how did I do that?
The stack tube front and you can see where the antifreeze was coming out the seal and going into the seal and going into the stack tube (salt water).
The salt water circulates through the holes and then out of the boat. The antifreeze circulates around the stack tube in the heat exchange..
So course every part got toughly cleaned and we had new O-rings that we installed.
What we think happened is this
When I put the stack tube in I did get the O-rings seated right as I made sure of that. That's not to say that one could have slipped as I was bolting the stack tube in. That is where the mistake could of happened.
When I bolted the stack tube in first you should align the grove of the aft stack tube with the bar on the stack tube. You can turn the stack tube side to side a bit if you have it centered. Then I removed the aft cover after it was in place, holding the front of the stack tube in so it does not move by pressing on the forward end. Then holding the stack tube at the forward end I tightened the back stack tube (we have one bolt) by hand and tight as I could get it and was pushing in on the aft stack tube to get the bolt as hand tight as possible. Then I put in the forward O-ring and made sure it was seated prpperly. Then holding the aft stack tube cover (just in-case) I hand tightened the front stack tube cover bolt as tight as I could get it by hand. Then took turns on each end evenly. Meaning, say a quarter turn on the back then a quarter turn on the front etc. until good and tight but not forcing the bolts as we do not want to snap one off. The bolts do bottom out in the stack tube.
So, Wa La, all done and it worked great the second time around which was after we finished putting it all back together. We re-filled the antifreeze with the old stuff which was still new. Then we tested the system and it worked fine and pure salt water coming out of the impeller housing an d no other leaks. Then we had to drain the system of the old antifreeze and we put brand new Prestone 40\60 antifreeze in that Debbe mixed up. Re-burped the motor again and we are good to go, well after we fix the hose.
We think the antifreeze to salt water leak was only leaking when the cooling system (antifreeze) was under pressure. Our system generates 13 lbs pressure and that's when the antifreeze would push out.
So if we filled the system with water and pressure tested it then if there was a leak we just drain the water into the bilge and the bilge pump pumps it out. If it does not leak then the same thing only we re-fill with antifreeze and it is done. No wasting antifreeze as our engine access is not great so getting the santifreeze from the bilge using a wet vac. Now we drain it inot yogurt cups and then dump them into a bucket. Then pour the bucket into containers for disposal. A bit easier and less messy than the wet vac.
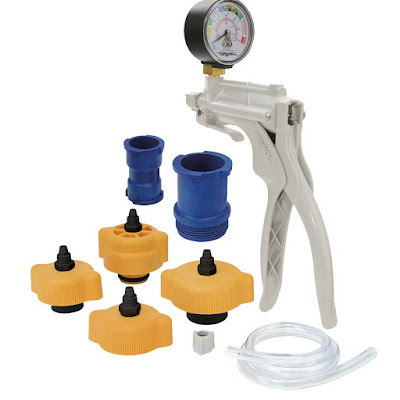
So this lesson gave us an idea. A new tool. Love new tools! If we replaced the seals in the stack tube (recomended every year) then with a Coolant Pressuer Tester kit something like this
Note:
We ended up purchasing a Stant Pressure Tester. Not the one above.
Now back to the hose.
It looks like the hose is fine. It may be a crack in the impeller housing.
This means a new post for the leak.


No comments:
Post a Comment